how to draw a simple 3d book
Easy 3D Volume Drawings for Beginners
Learning to practice a book cartoon is really piece of cake, and perfect for beginners. Today you'll be learning how to draw a book using both ii point perspective and one bespeak techniques to brand information technology 3 dimensional.
We'll be using the 1 and ii point perspective concepts, simply we're going to do it freehand.
However, you lot could use a ruler if you want to. But I like keeping the drawings loose and taking a more relaxed approach to creating art. I find it to be much less stressful.
Bank check out some of these book photos if you need some ideas for your own drawings.
Iii things you'll learn,
- How to use two betoken perspective to describe a volume in 3D
- The difference between ane signal and two point perspective
- How to use foreshortening for dramatic effect
What'due south the Departure Between One Betoken Perspective and Two Point Perspective
One bespeak and ii point refers to the number of vanishing points used in your drawing.
One indicate perspective is used when yous are looking directly on at the face of a shape or object.
2 Point Perspective is used when you are looking at an object from an angle. This is a much more interesting view point, and is only slightly more complicated.
For our book drawings today, yous'll be learning how to draw a volume using both one and two point perspective.
* Some of the links in this post may be affiliate links. This ways I receive small commissions for purchases made through these links at no actress cost to you.
Art Supplies
- Paper or cardstock
- Pencil
- Eraser
- Blending stump (optional)
FREE One Point Perspective Worksheet
How to Draw a Book Using Two Point Perspective
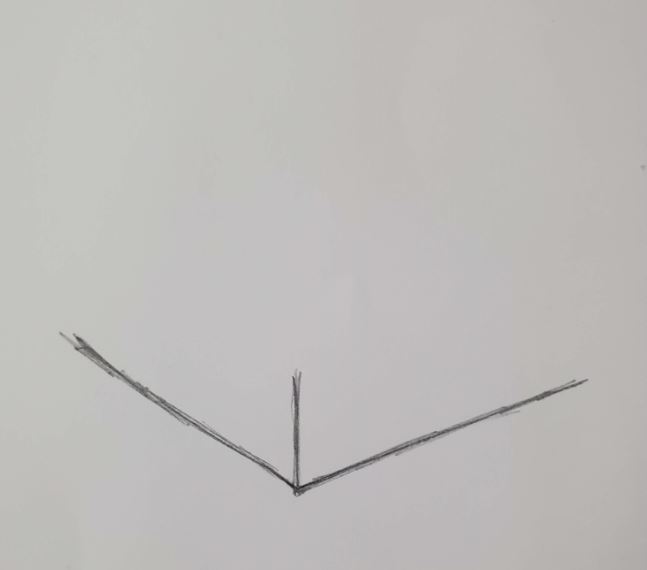
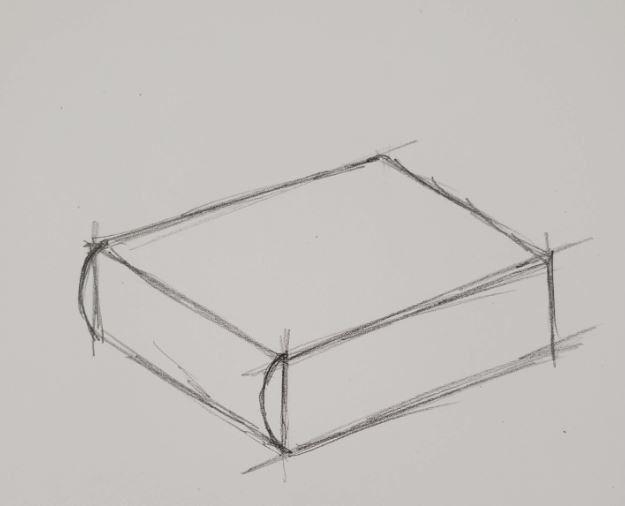
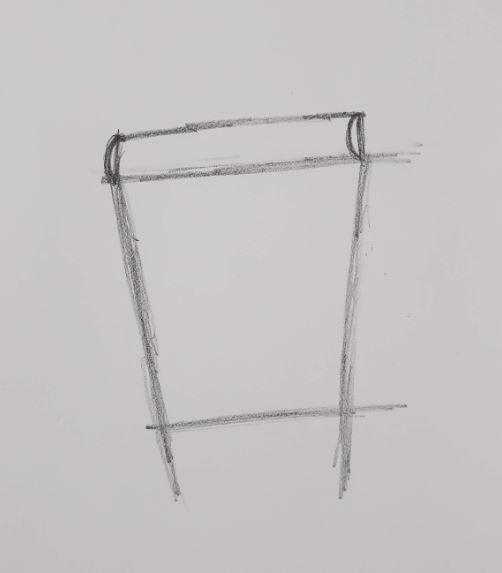
We are going to start by roughing out our bones shape for our volume drawing. Since nosotros are going to describe a book in 3D, nosotros will use a cube. We'll use the same process as in How to Draw a Cube, but nosotros will make it shorter.
Lightly sketch out your cube using a pencil. Draw the border closest to y'all first. Keep in mind how thick you desire your book to be.
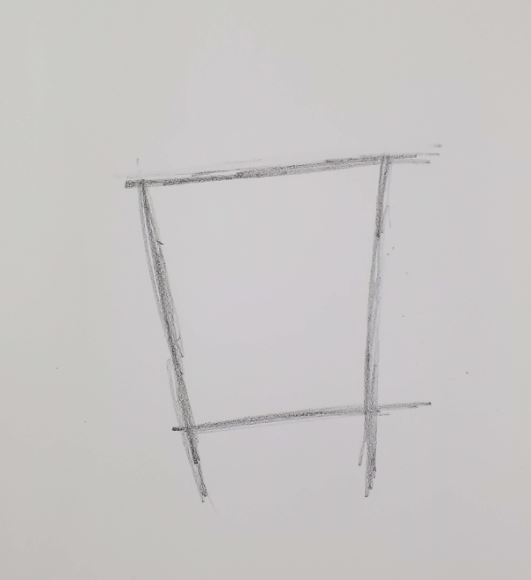
Next, draw the bottom edges of your book. Your lines should make a slight "V" shape.
So draw the line for the summit edge of your book shape. These lines should be parallel with the lesser lines.
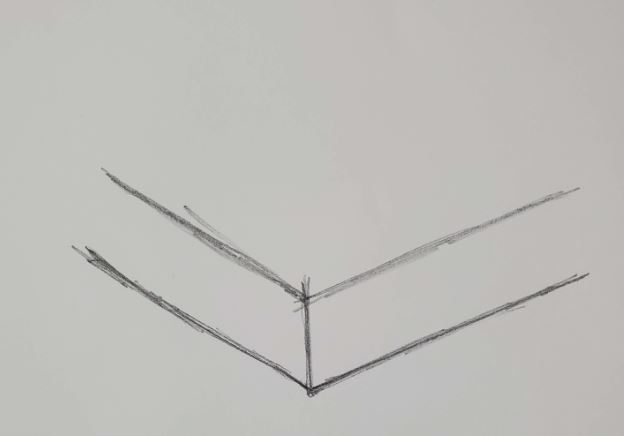
Draw the short vertical lines at each end of your volume. Don't worry about your lines extending beyond where they need to be.
But draw lightly and erase the actress afterwards. Information technology's really easier if yous go a little by where you need to end considering yous can follow through with your pencil strokes.
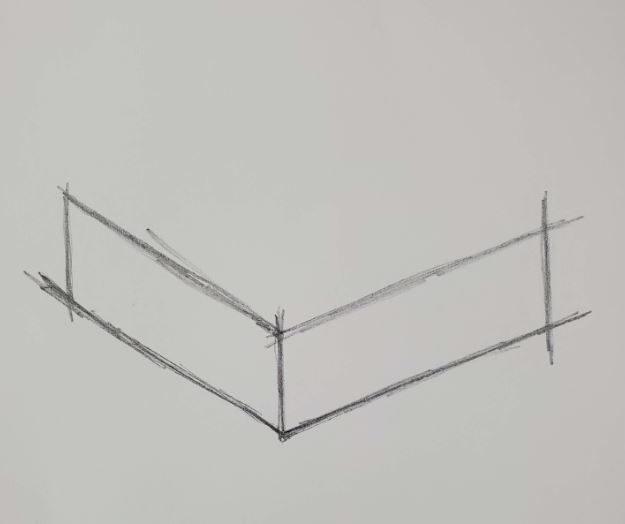
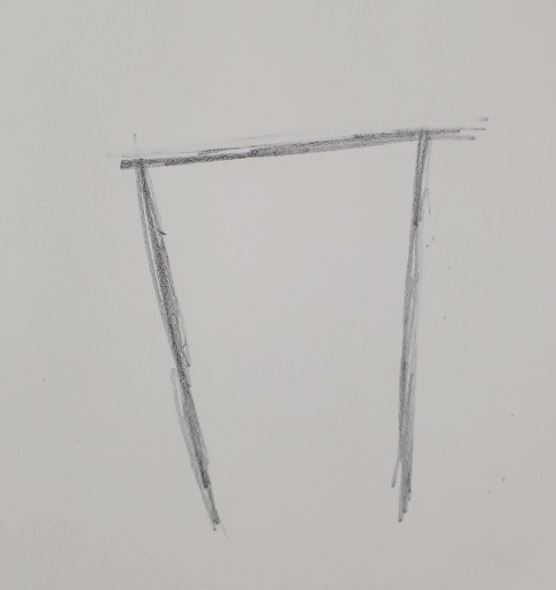
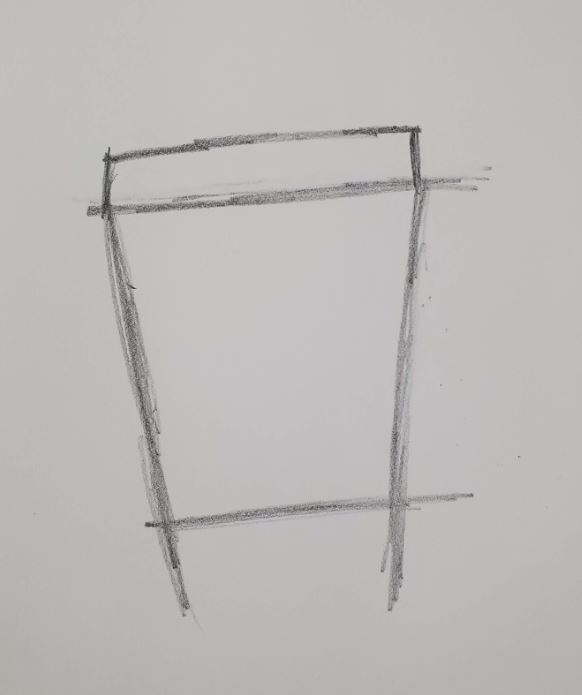
Now draw the back edges for your book drawing. These need to be fatigued parallel with the lines direct across from them.
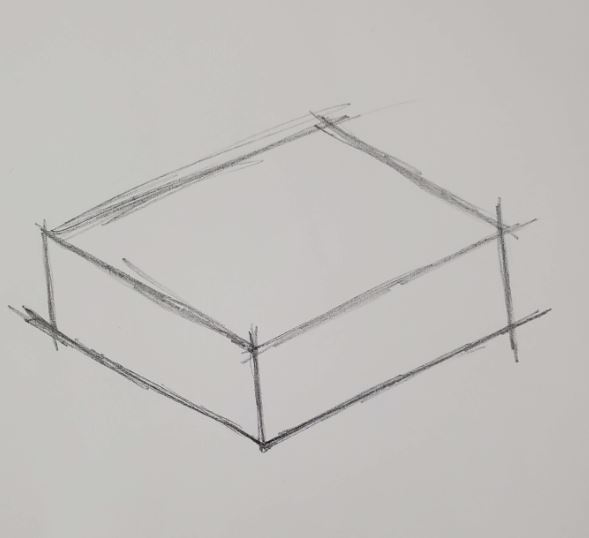
You now have the rough shape of your 3D book drawn out. Now let'south add some detail and brand it expect like a book.
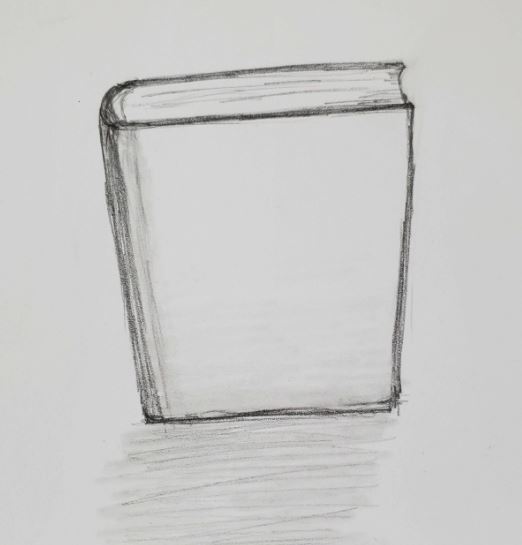
How to Depict a Volume Spine
For the spine edge of your volume draw a couple of curved lines.
Then depict another curved line at the other side to show the pages.
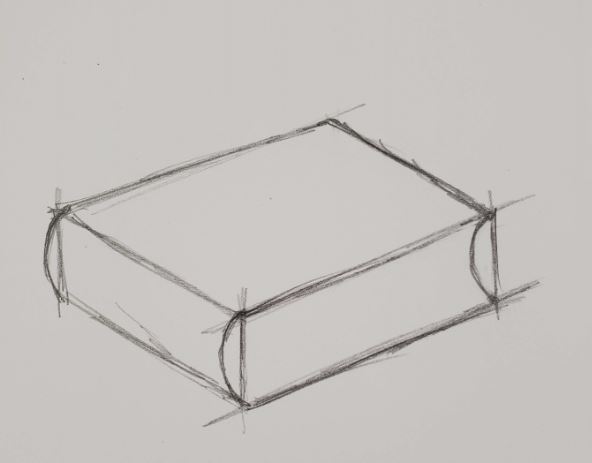
You could describe the pages straight down, just I think they look more interesting curved.
Add additional lines to show the thickness of the book embrace.
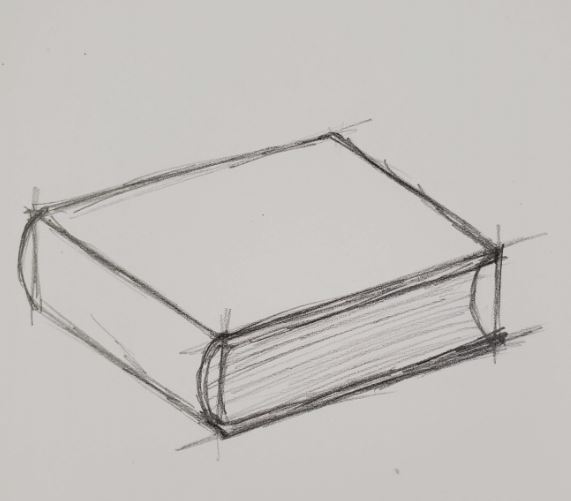
Add shading to your book to aid with the illusion of it being 3D.
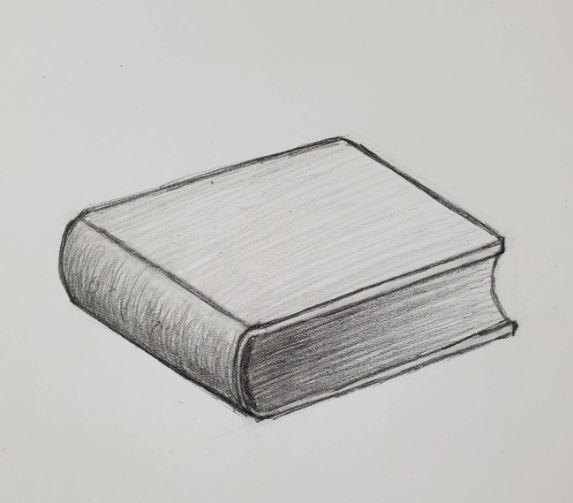
Determine where your lite source is commencement. For this example, it's coming from the upper right side of the volume. This will make the lower left of the book the darkest areas.
Now allow'southward look at how to draw a book using one bespeak perspective.
One Point Perspective Volume Drawing
This drawing of a 3D volume is so easy to exercise. And if you describe it correctly, will expect like it's popping off the folio. It uses a unmarried vanishing point to create the 3D effect.
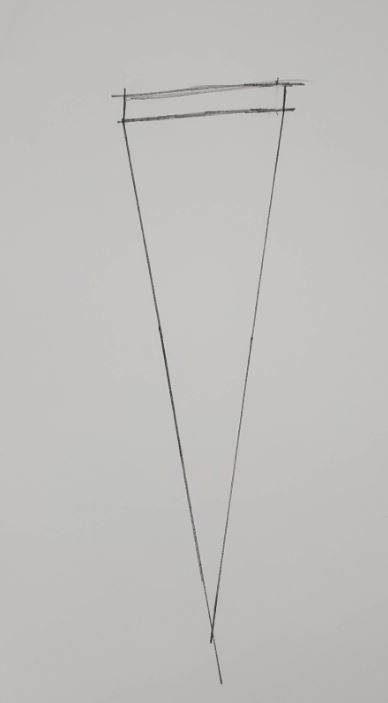
Begin by drawing the top edge of your book along with the 2 sides.
When cartoon the sides you desire to imagine them coming together at a indicate somewhere, waaay down your paper. You don't have to draw them that manner though. But if y'all did, information technology would wait similar this.
Next, draw the lesser edge of your book.
Now draw the meridian of your book. The brusk lines for the edges of the top part should be parallel with each other and straight.
Yous can add together in some item to your book cartoon now that you have the basic shape fatigued out.
Depict a couple of curved lines for the spine and the pages.
Add together in some shading and a cast shadow, and your one betoken perspective book is finished.
I love how information technology looks like it'southward standing on end and popping off the paper.
How to Describe a Book | Piece of cake 3D Drawing for Beginners
That'south it for today. I hope yous enjoyed our lesson on how to describe a volume in 3D. Doing 3D drawings tin can be really rewarding.
And whether y'all're learning to depict in 3D or anything else, you'll only get ameliorate by practicing.
Good luck on your creative journeying and hope to see you shortly.
Don't forget to grab your free 3D Drawing Guide.
More 3D Drawing Tutorials
- Pencil Value Scale
- How to Draw a Cube
- Anamorphic Stairs Drawing Tutorial
- Cartoon Letters in 3D

Roshanda is an art didactics blogger who is on a mission to motorcoach and encourage as many aspiring artists as possible through the use of her blog. Acquire more virtually her on the About Me page and connect with her on Facebook, Twitter, and Instagram.
Source: https://artbyro.com/book-drawing-3d/
0 Response to "how to draw a simple 3d book"
Post a Comment